 Baking this bread was my first real success in the kitchen. I kept hearing about a super easy bread recipe sweeping the East Coast a few years ago. It was purported to be simple, foolproof, and it didn’t even require kneading. Having never given bread baking any thought whatsoever, I just assumed it would be complicated and prone to failure, especially for someone whose only experience with fresh, artisan bread was buying it from a bakery. I was stunned, to say the least, when I learned that it only required four ingredients. Four!
Curiosity piqued, I printed out the recipe – but then I let it rest for a week before even reading it. Then, feeling cautiously optimistic one day, I set out to try it. I didn’t even tell my husband, since I didn’t expect it to turn out: In fact, after I made the dough I hid it in a closet overnight! This sure-to-be-doomed experiment was to be my secret to keep, but I was determined to try.
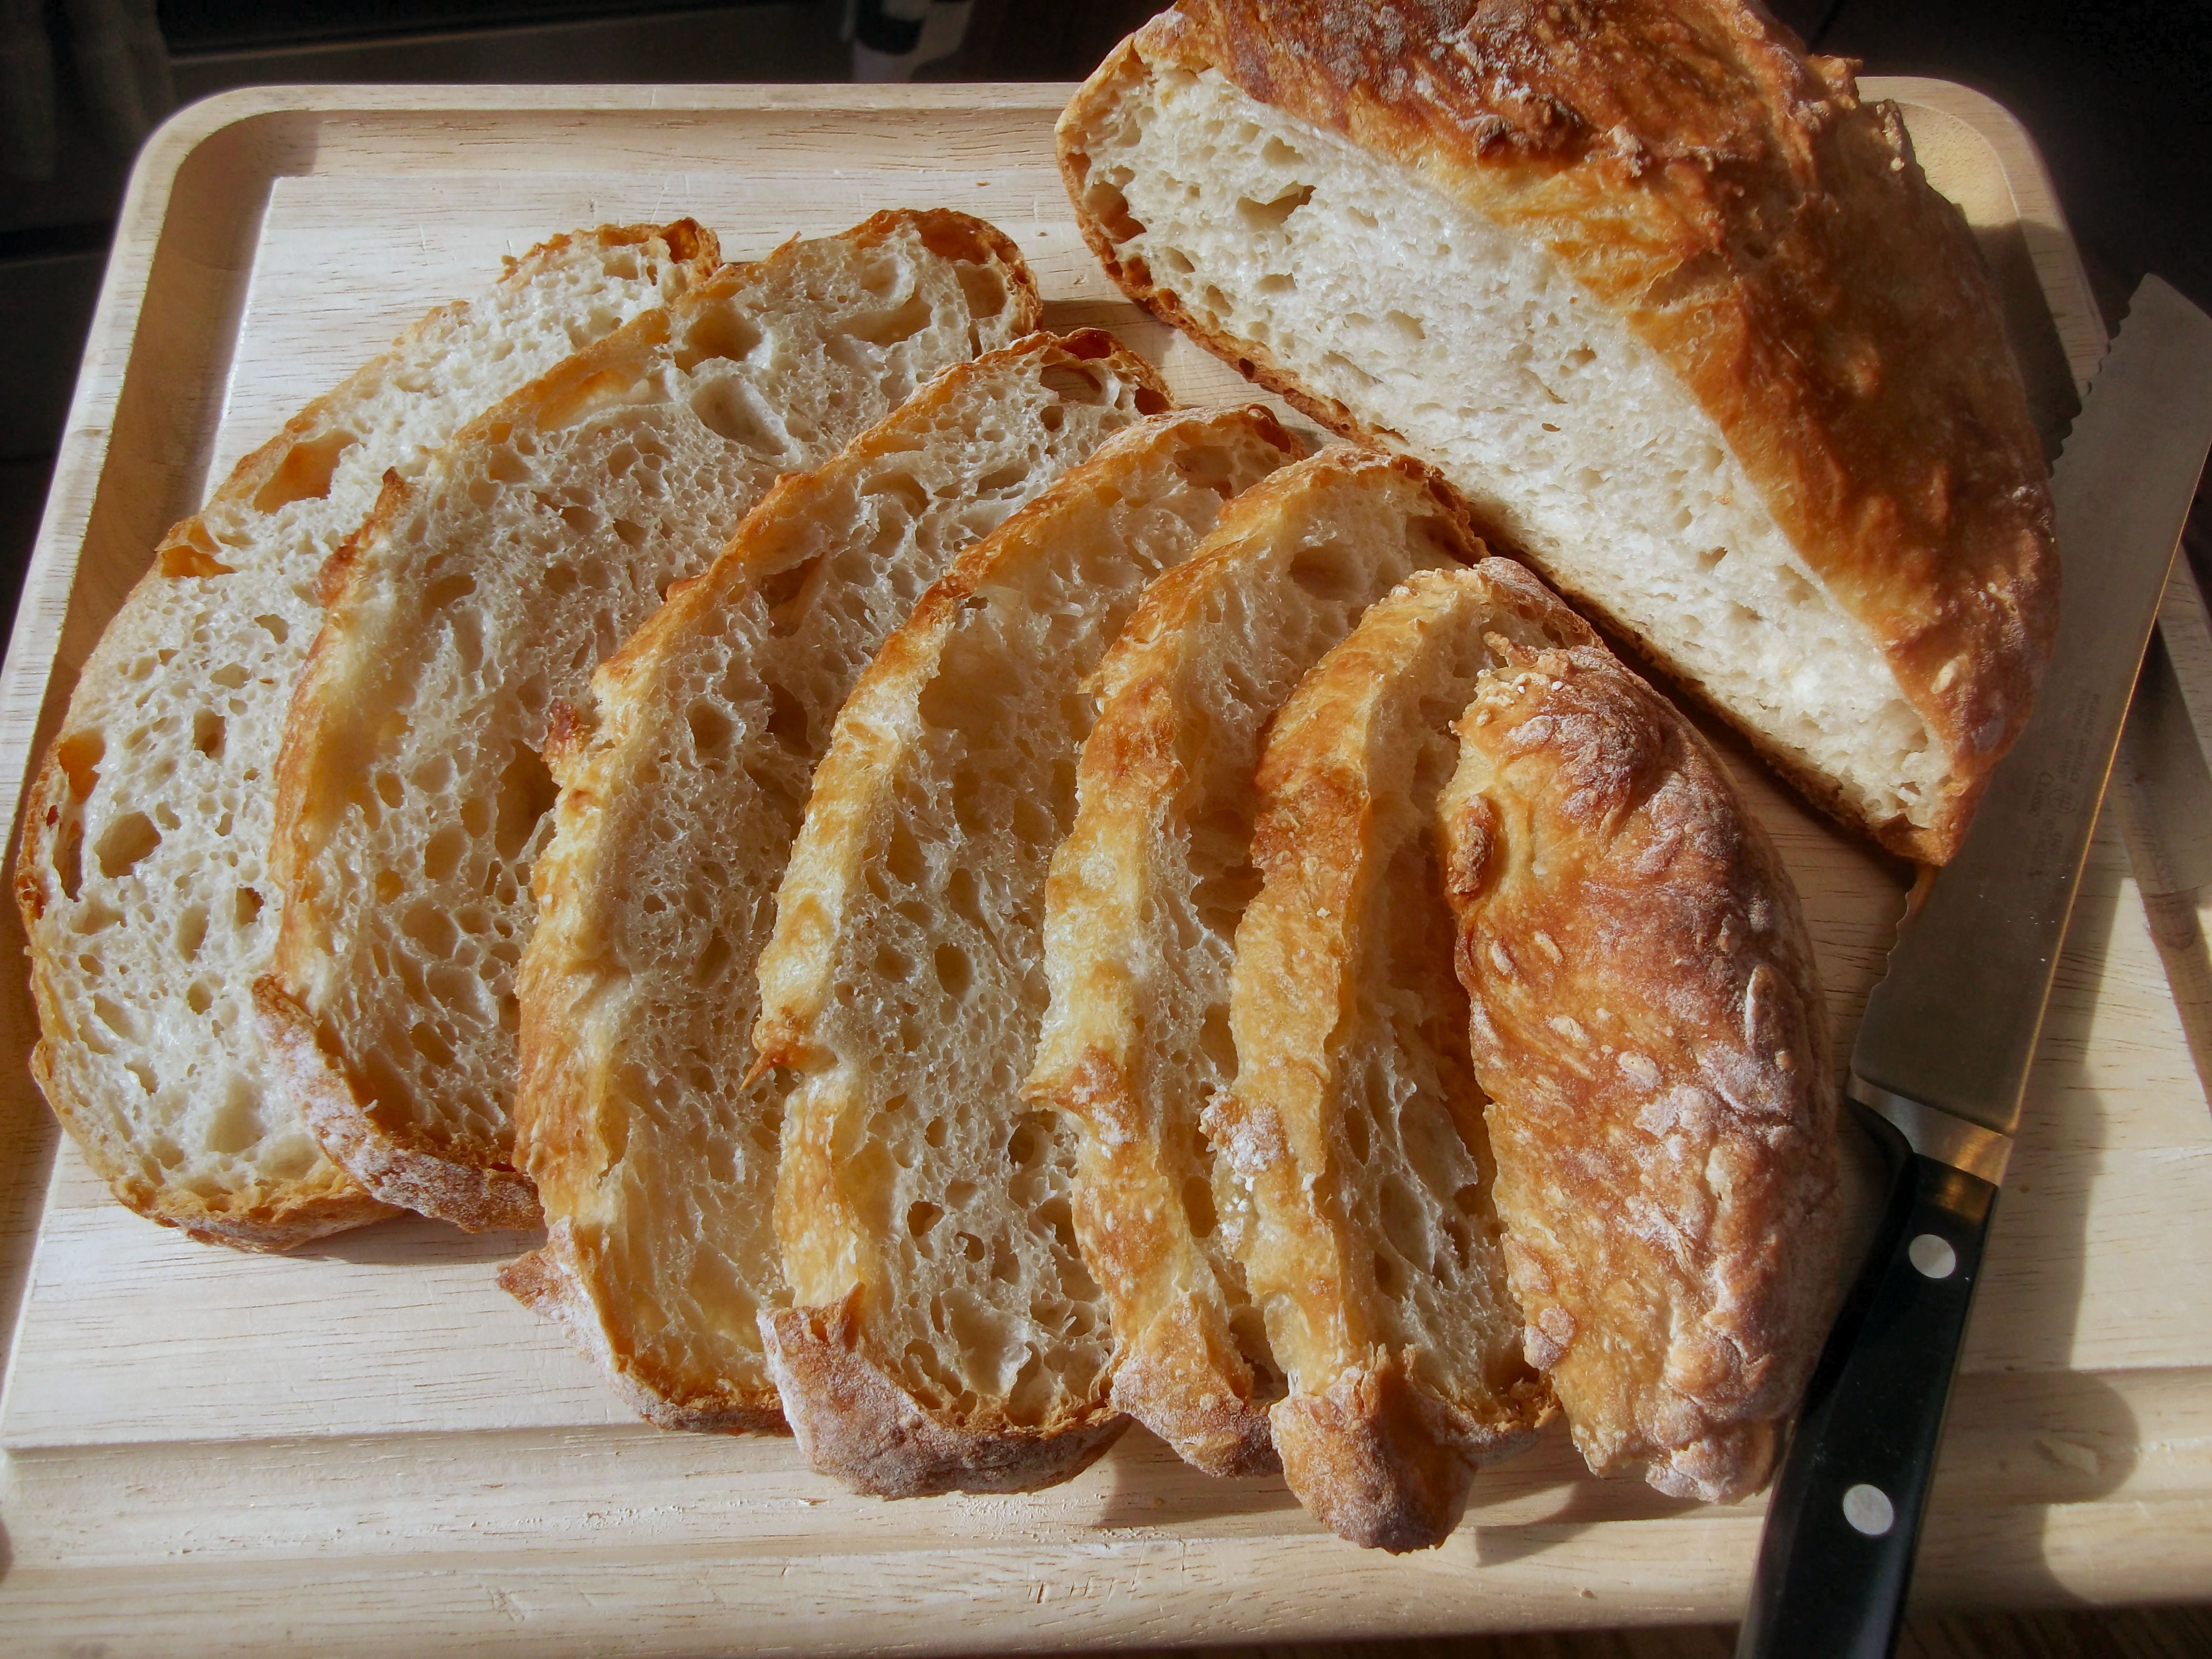
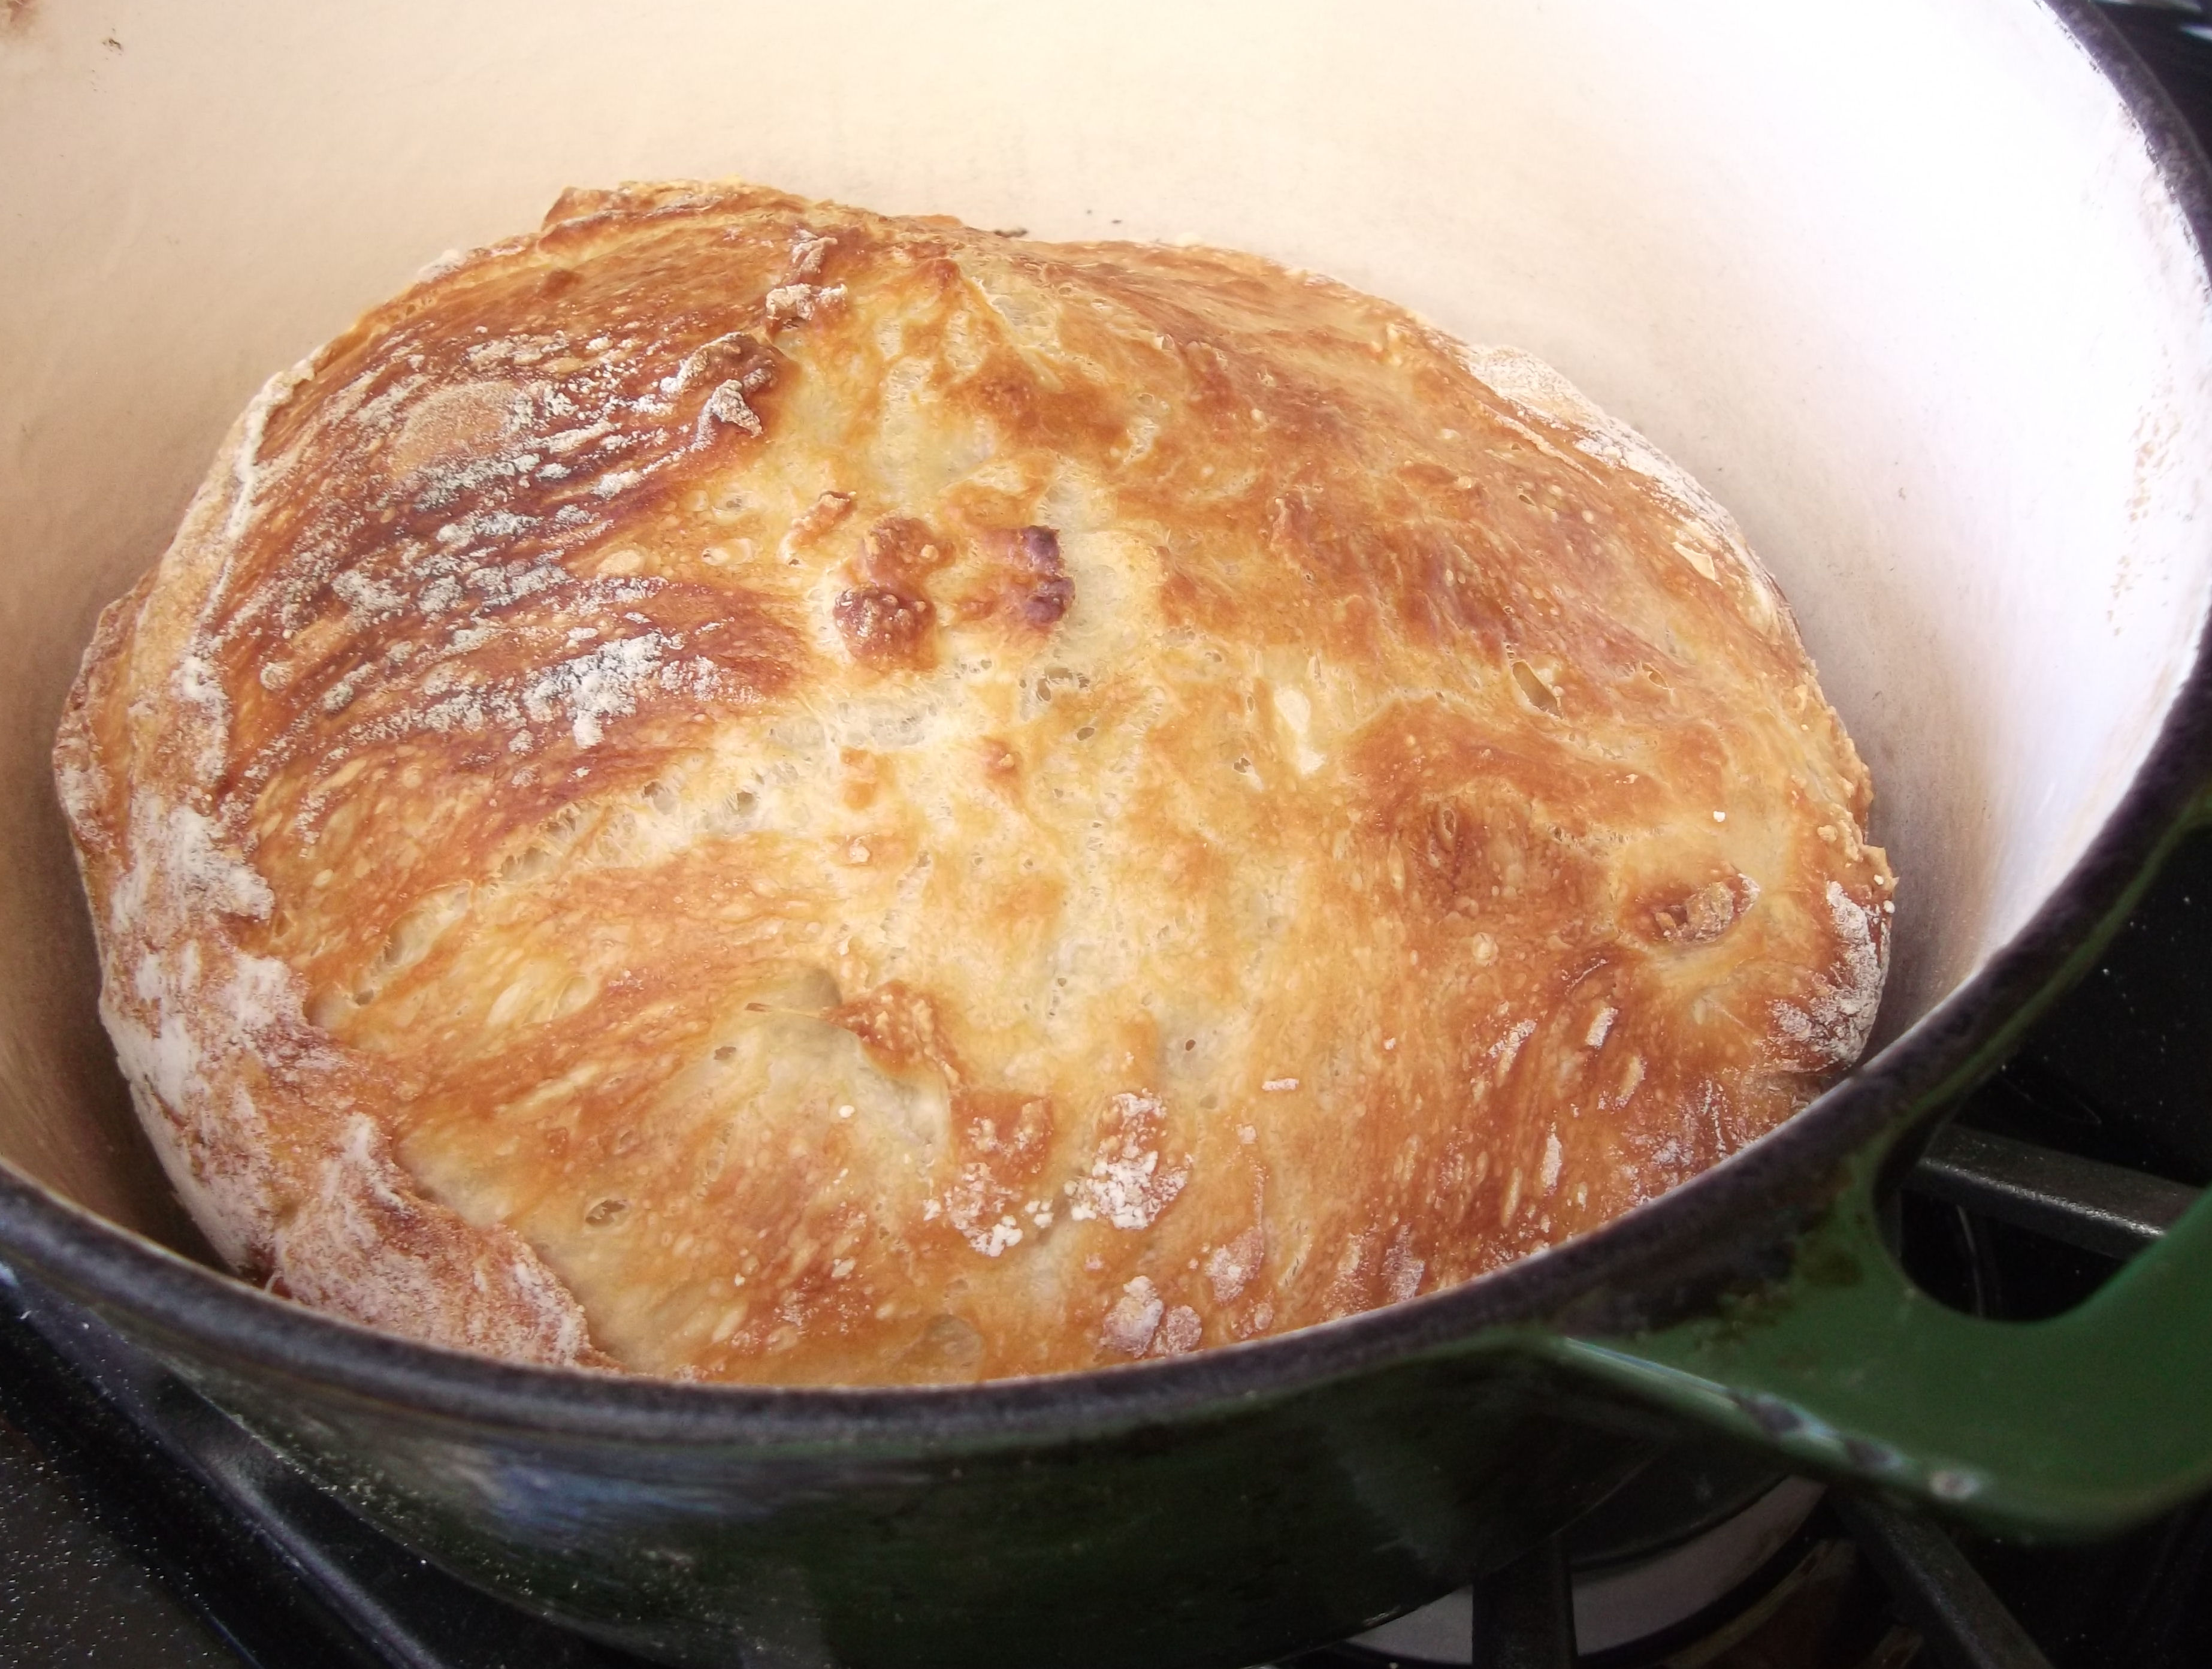
The next day, after following the steps to get the dough in the pot, a strange thing happened. My kitchen warmed and started to fill with the delectable, yeasty aromas of freshly baked bread. It smelled heavenly! I was shocked and delighted to see that my experiment had been magically transformed into something that looked, smelled and felt like real bread. The round and perfectly-domed loaf was a gorgeous golden color and had a satisfying heft to it.
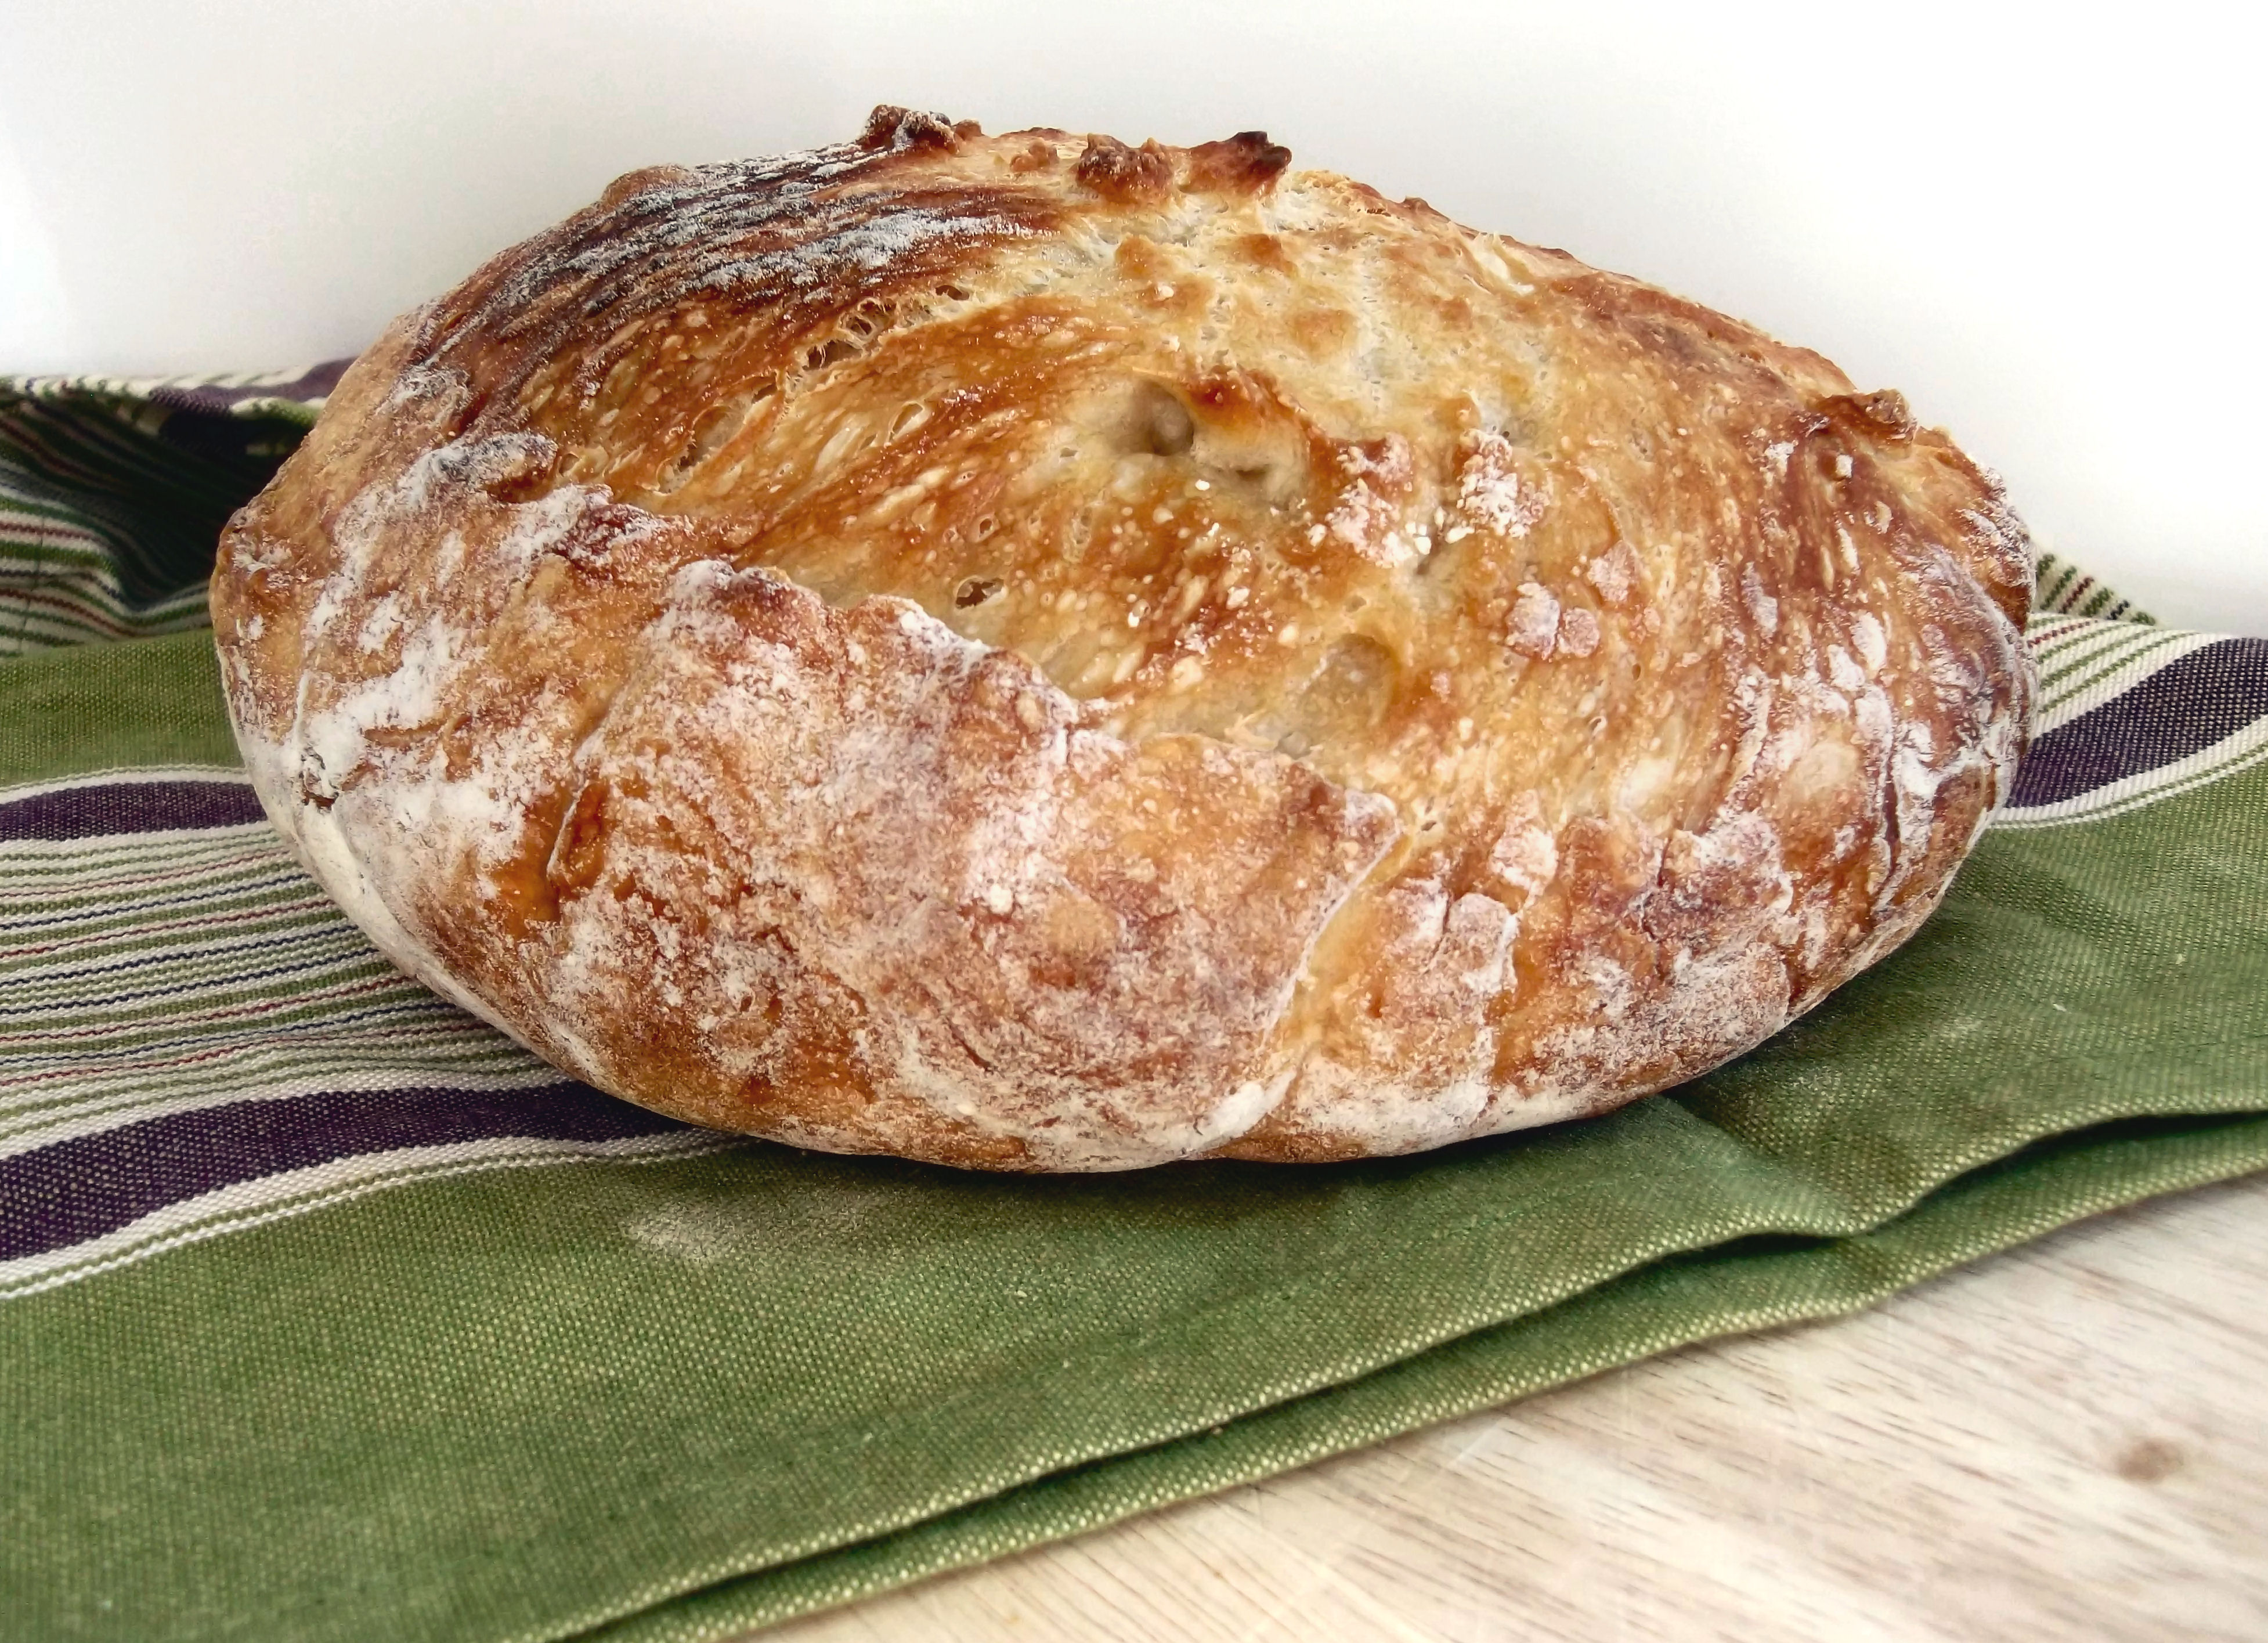
I allowed it to cool before slicing into it, my bread knife crunching through the crusty browned exterior with very little effort. The bread had a light and airy texture and tasted divine.
That night at dinner, after my husband took his first bite, his eyes lit up and he asked where I got this delicious bread. When I told him I’d made it, he gave me a “nice try, but you’re not fooling me” look and asked again. I told him — again — that really, I made it, but it wasn’t until I showed him my flour-dusted recipe that he was finally convinced.
So with this small triumph to bolster my confidence, I ventured into the kitchen again and again, determined to conquer the unknown and broaden my culinary horizons. And the result? Many successes, a few absolute messes and ultimately, this food blog.
No-Knead Bread Recipe
Adapted from the original Jim Lahey recipe in the New York Times from Mark Bittman
3 cups all-purpose flour, plus more for dusting
¼ teaspoon instant/active dry yeast
2 teaspoon salt
1½ cups + 2 tablespoons water, about room temperature
Cornmeal or more flour for dusting
Two (2) cotton kitchen towels
4- to 8-quart heavy covered pot (for best results, use a cast iron enamel Dutch oven)
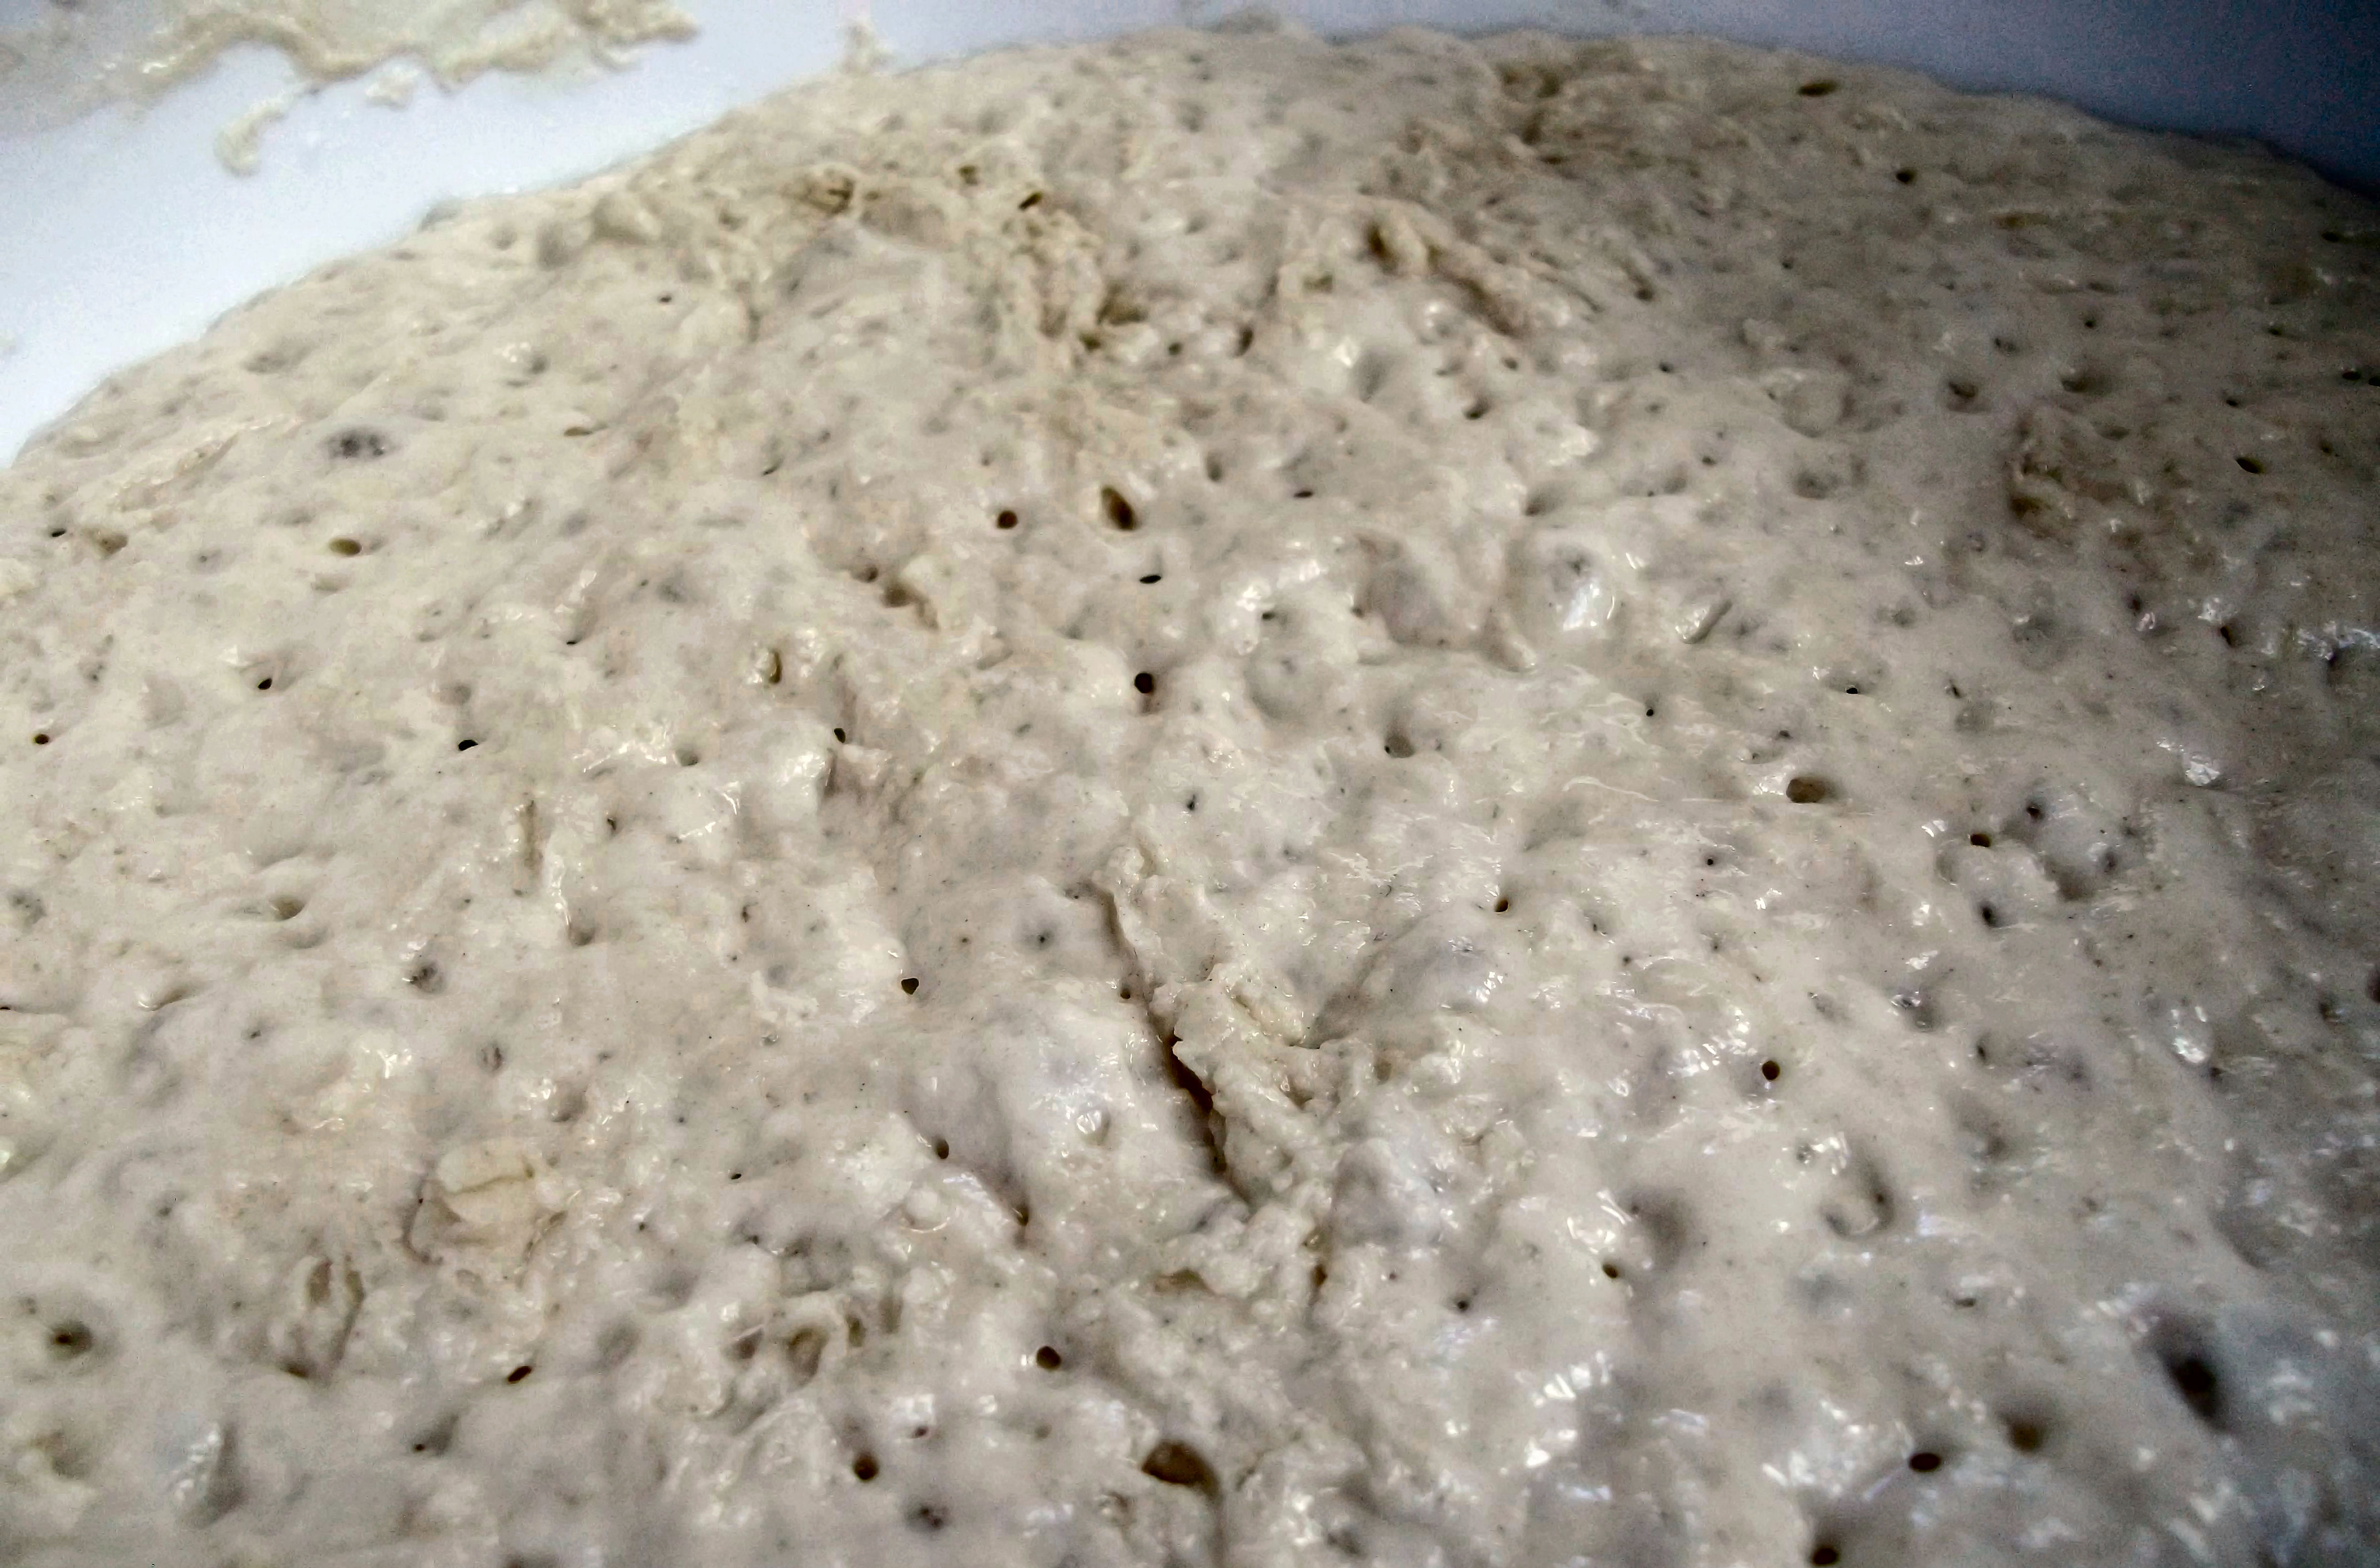
In a large bowl combine the flour, yeast and salt. Add the water and stir until blended; dough will be shaggy and sticky. Cover the bowl with plastic wrap and let rest at least 12 hours, preferably about 18 hours, at warm room temperature (about 70 degrees F).
The dough is ready when its surface is dotted with bubbles. Lightly flour a work surface and place the dough on it; sprinkle it with a little more flour and fold it over on itself once or twice. Cover loosely with plastic wrap and let rest about 15 minutes.
Using just enough flour to keep dough from sticking to the work surface — or to your fingers — gently and quickly shape the dough into a ball. Generously coat a cotton towel (not terry cloth) with flour or cornmeal; place dough seam-side down on towel and dust with more flour or cornmeal. Cover with another cotton towel and let rise for about 2 hours. When it is ready, dough will be more than double in size and will not readily spring back when poked with a finger.
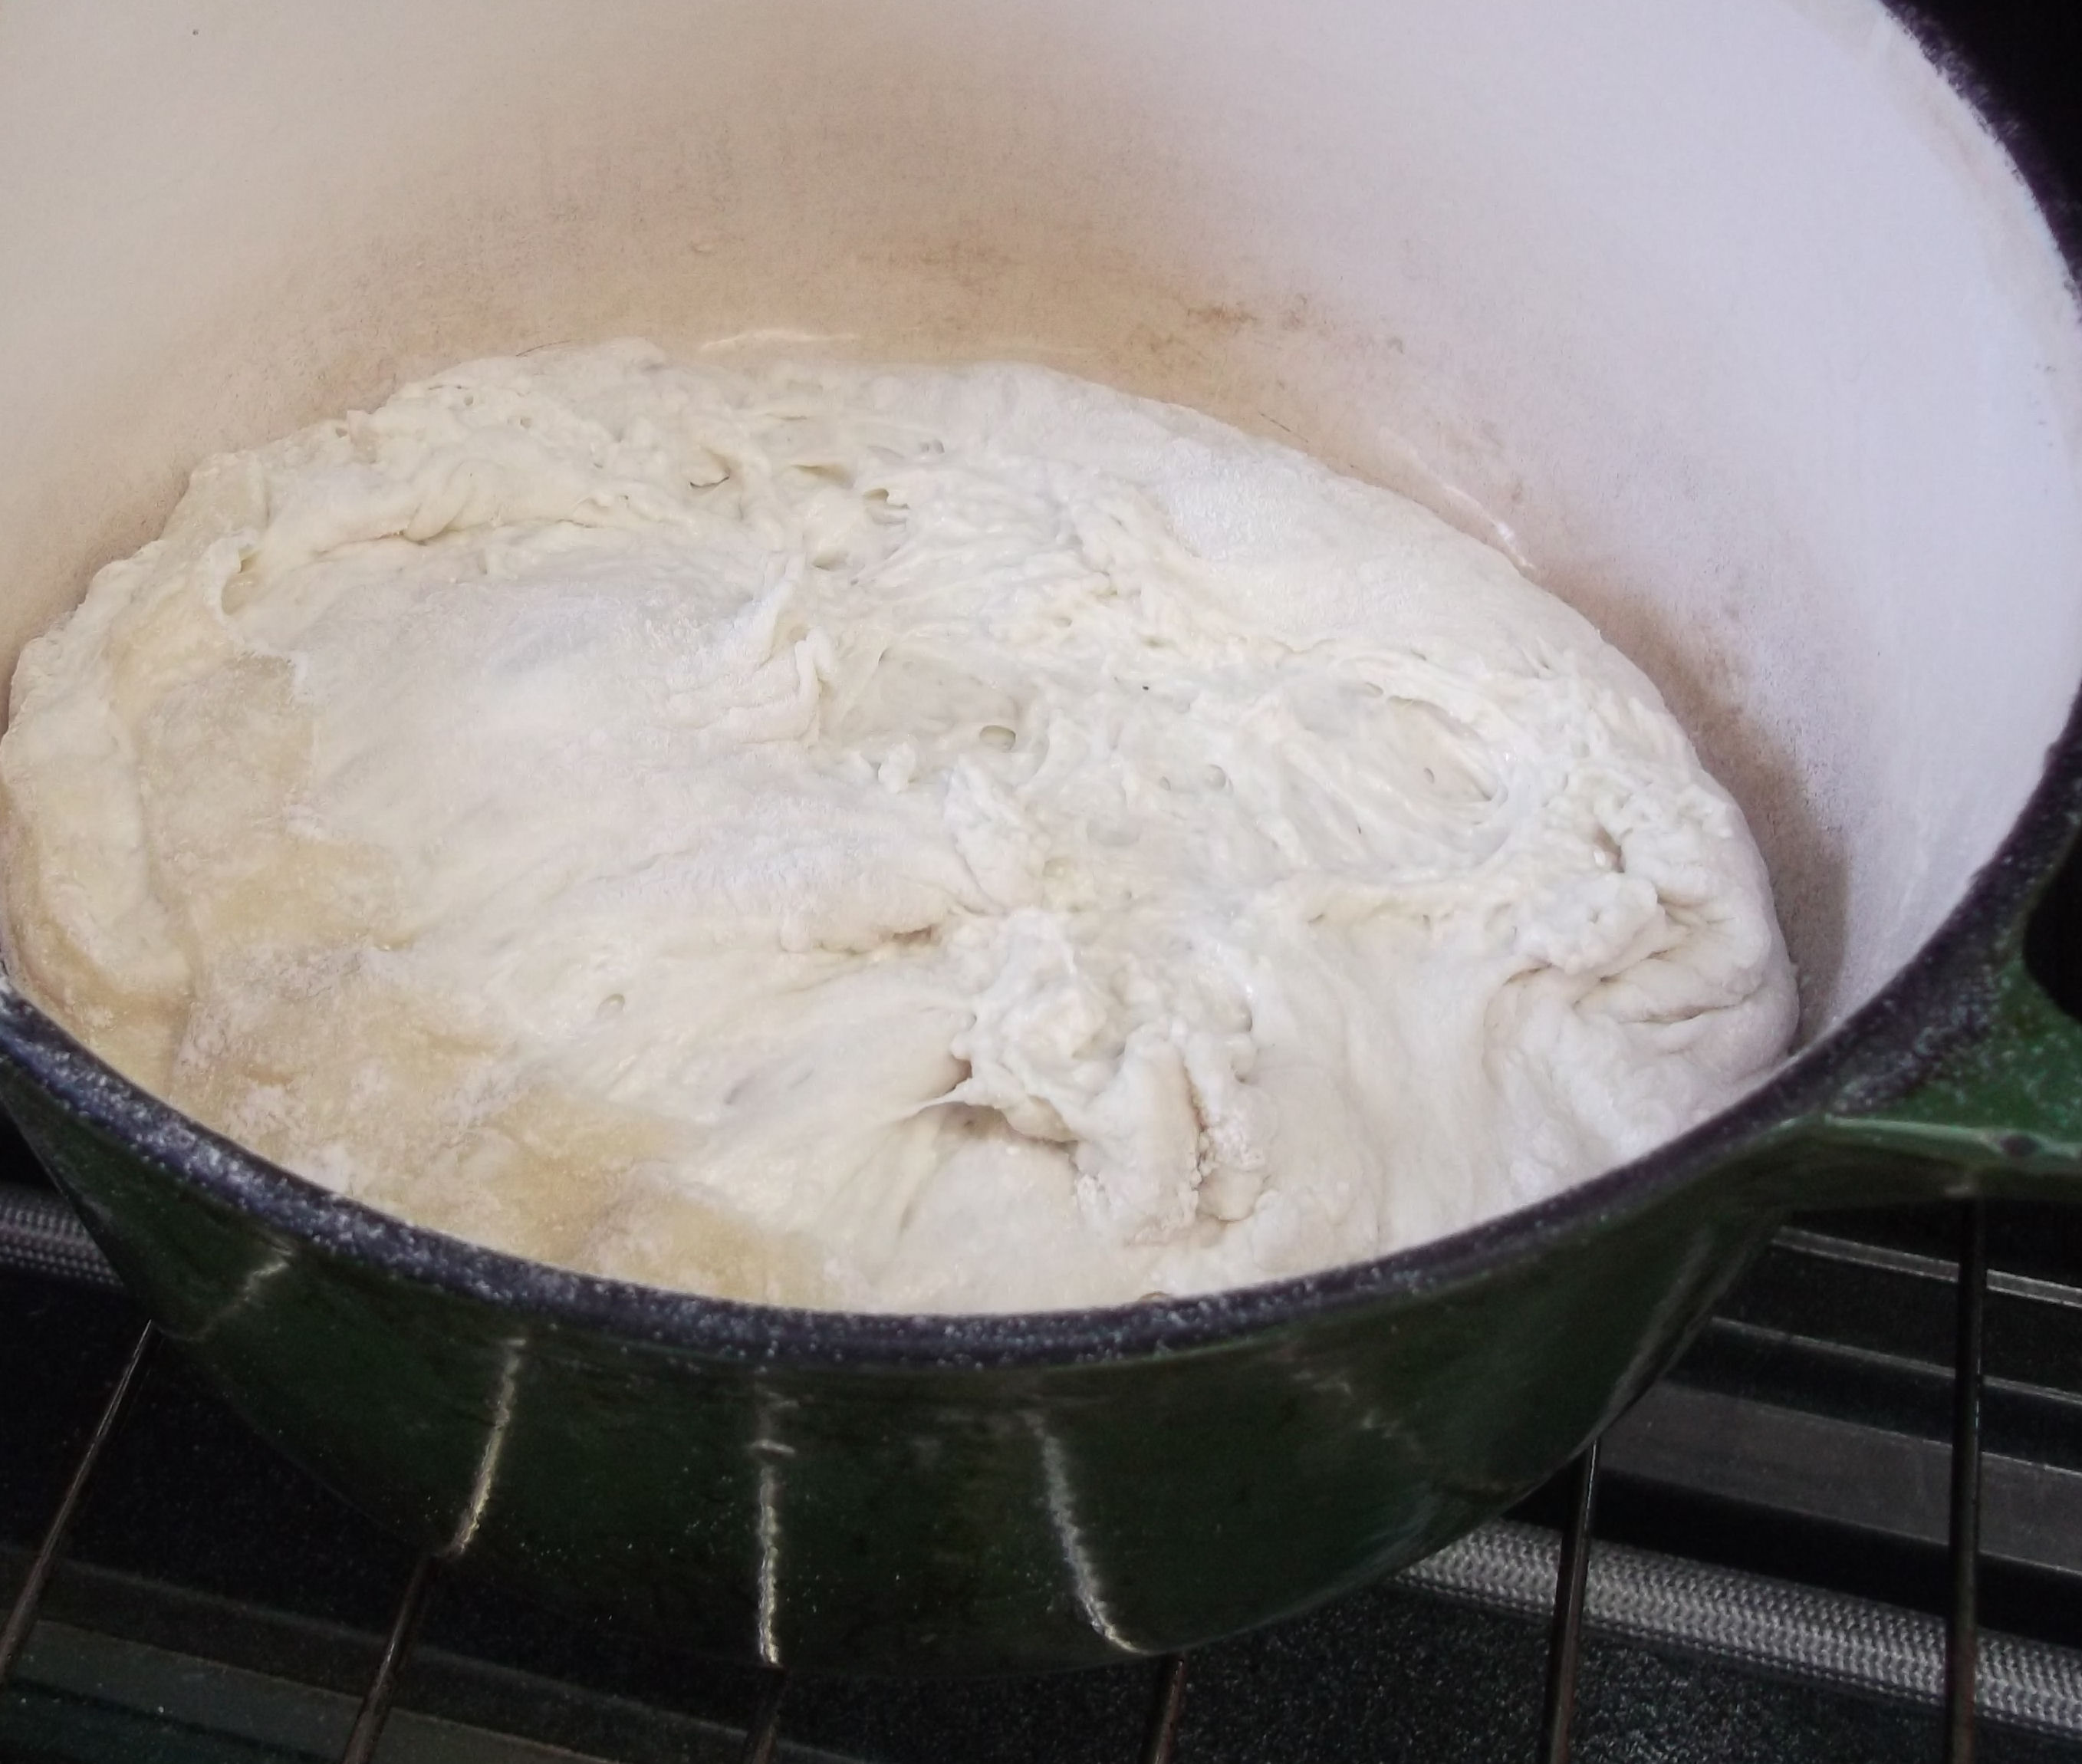
At least 30 minutes before the dough is ready, place the Dutch oven (or other heavy covered pot) on a middle rack in the oven and preheat to 450 degrees F. When the dough is ready, carefully remove the heated pot from oven. Slide your hand under the towel with the dough and turn the dough over into the pot, seam-side up; carefully peel the towel off the dough. Shake the pan once or twice if dough is unevenly distributed, but it will straighten out as it bakes. Cover with lid and bake 30 minutes, then remove lid and bake another 15 to 30 minutes, until loaf is beautifully browned. Cool on a rack before slicing.
Step by Step Details
I’m still in shock that this amazing bread has only three dry ingredients.
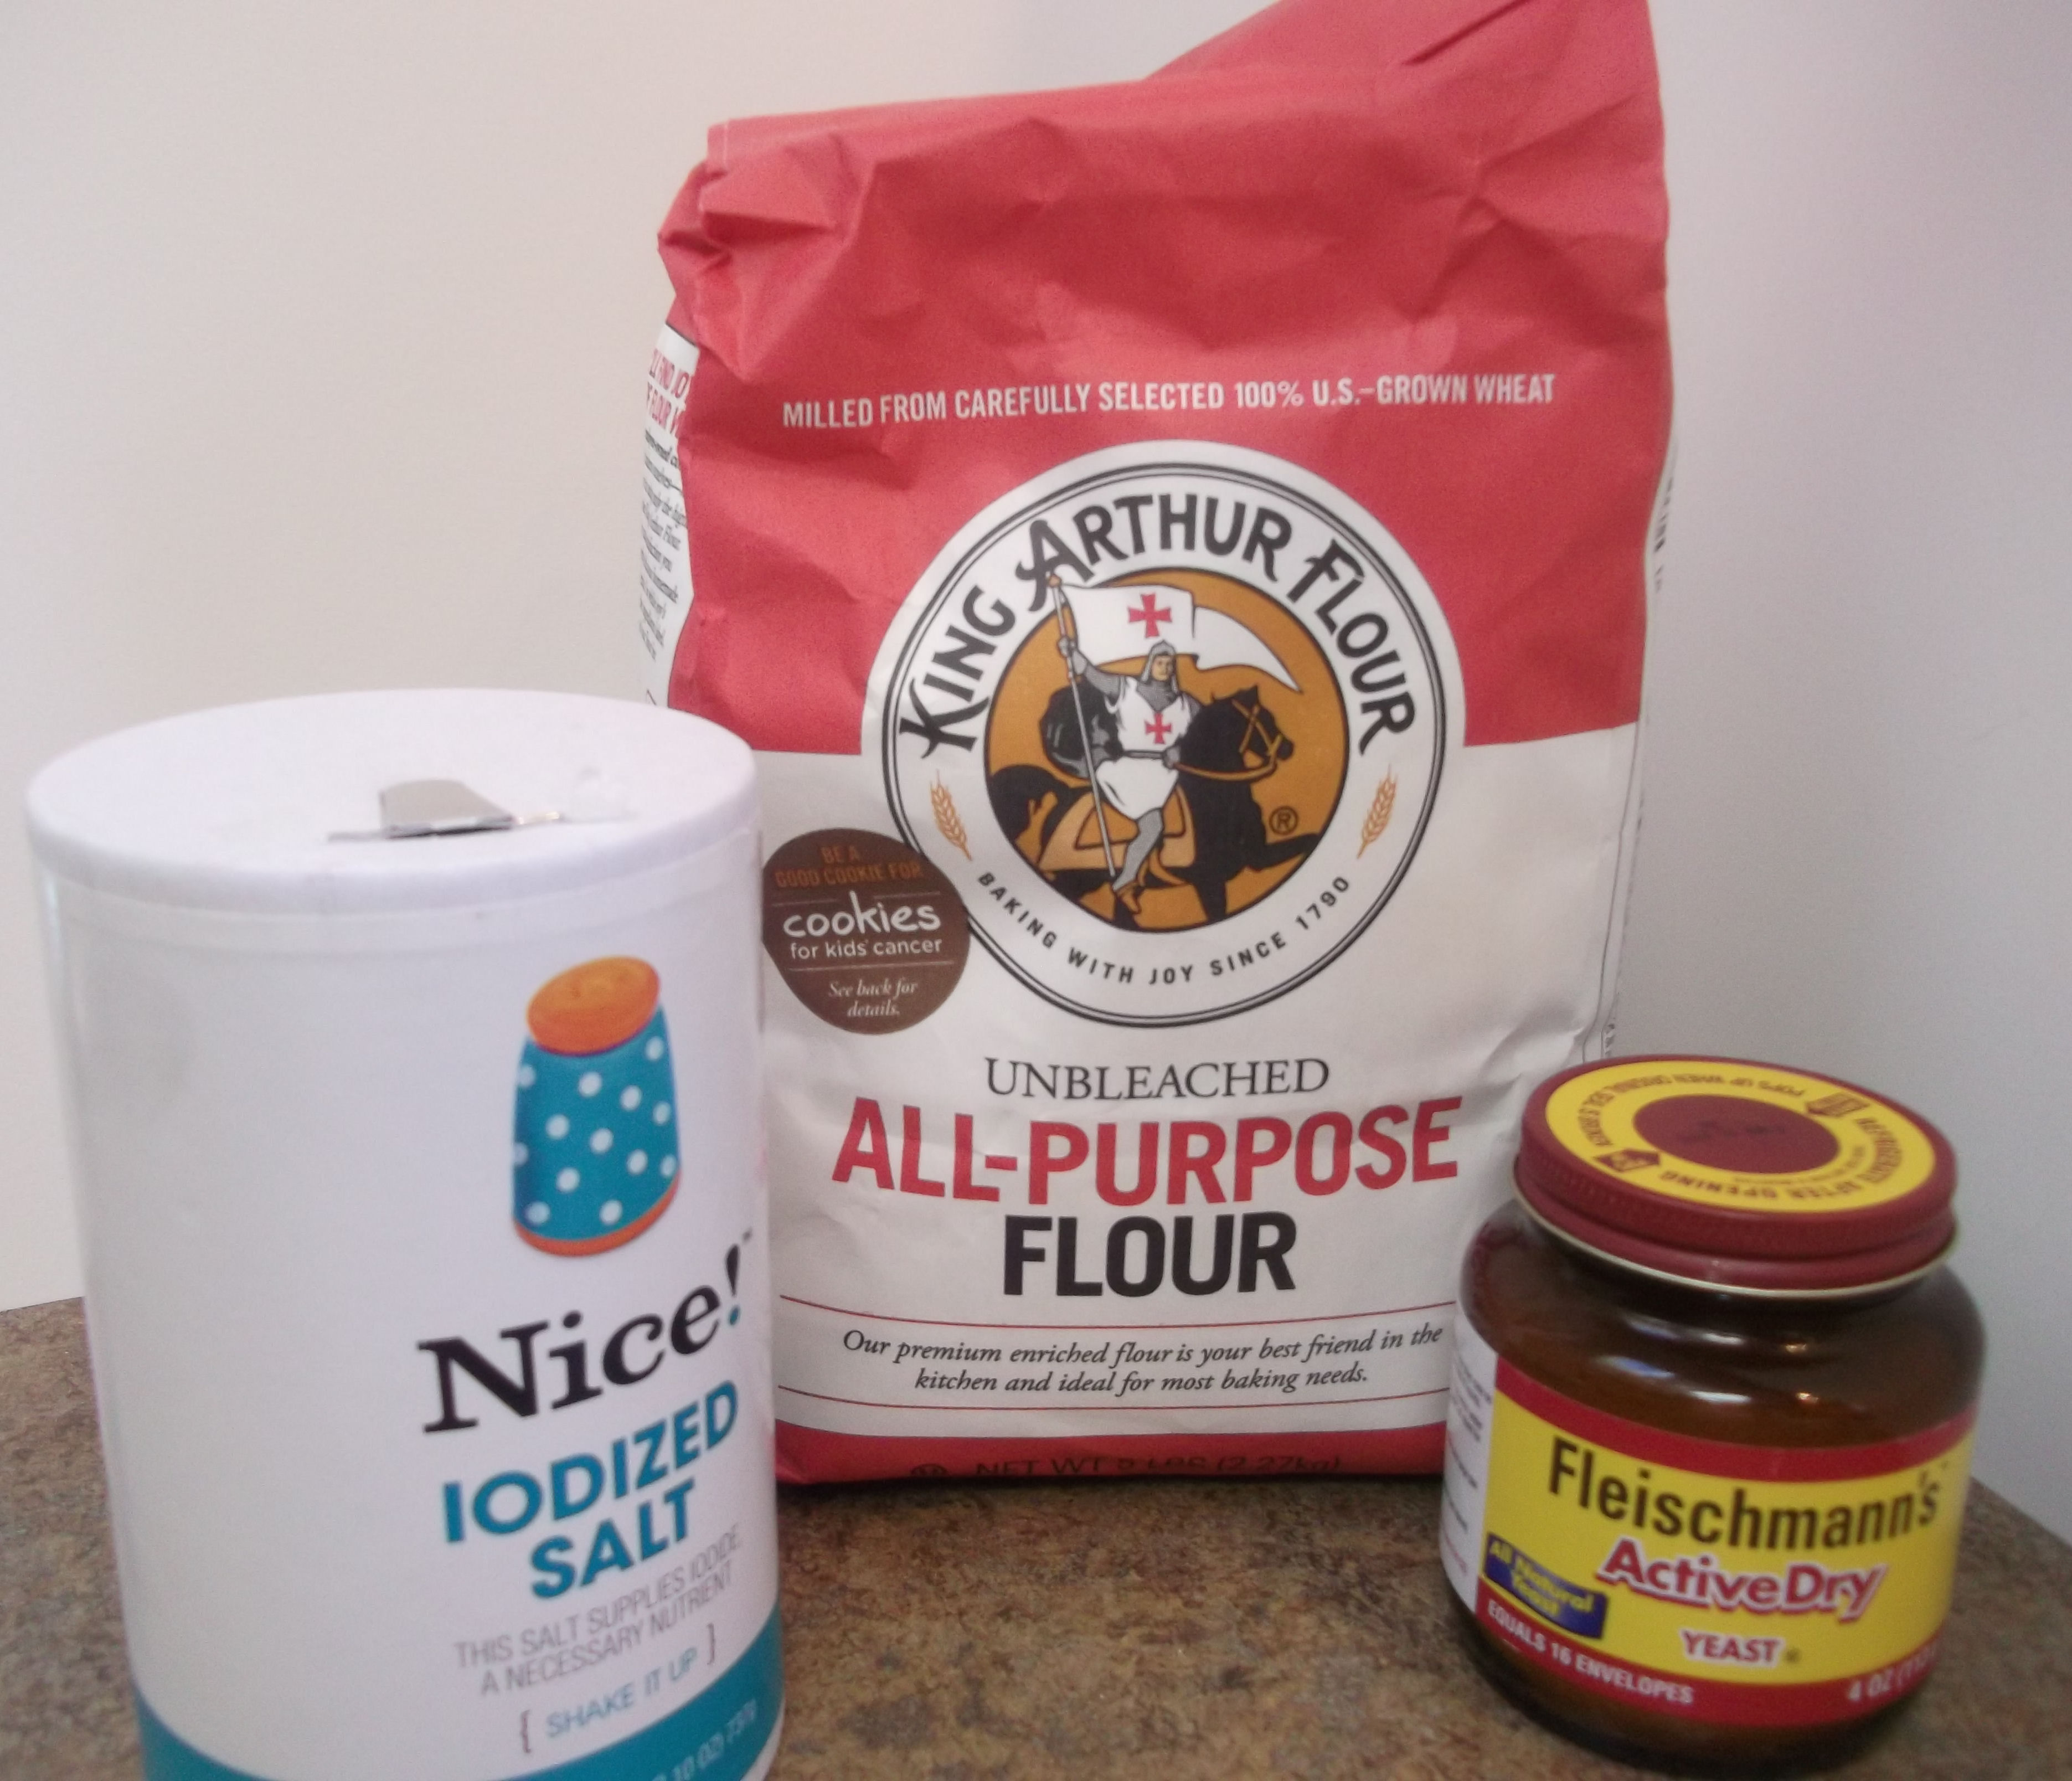
Measure them out into a large bowl and stir or whisk them together well: It’s easier to mix them really well now rather than once you’ve added the water.
Add the water, and stir with a wooden spoon (or even mix with your hands) just until blended.

Don’t overwork it: the dough is supposed to be shaggy and sticky.

Cover the bowl with plastic wrap. I love the Press and Seal type that really sticks to the bowl.
Let dough rest at least 12 hours, preferably 18 hours (or even longer), at warm room temperature, about 70 degrees F. To keep track of when my 12 to 18 hours is up, I write the “done time” range on the plastic. It’s so much easier to look and see what time it will be ready, instead of always counting backwards trying to remember what time I began.
 Don’t worry if you can’t read my handwriting. Most of the time I can’t read it either.
The dough is ready when its surface is dotted with bubbles.
Lightly flour a work surface and gently “pour” the dough onto it, using your hands or a spatula to scrape out any that sticks to the side of the bowl.

For my work surface, I use a flexible plastic cutting board. I like this because it’s portable (as long as you are careful with it, or put something rigid underneath it for transport), and it also makes the next step easier.
Sprinkle the dough with a little more flour and fold it over on itself once or twice. Again, work it very gently. Try and retain as many bubbles in the dough as you can.

Cover loosely with plastic wrap (just re-use the same piece of plastic wrap used to cover the bowl) and let rest about 15 minutes. Set a timer for this step if, like me, you are easily distracted and lose track of time.
While the dough sits under plastic, generously coat a cotton towel (not terry cloth) with flour or cornmeal. I used cornmeal here, but either one works as long as you use a lot (I used too little once and the dough really stuck to the towel). For what it’s worth, this dusting will end up being on the top of your bread.

After 15 minutes, carefully peel the plastic wrap off the dough, letting it unstick itself as you go. Using just enough flour (or even water) to keep the dough from sticking, gently and quickly shape dough into a ball. Again, try to retain as many bubbles in the dough as possible.
 If the dough is really sticking, just do the best you can to shape it without overworking it. The dough is very elastic now, and likely won’t retain a “ball” shape for very long.
Place the dough seam-side down on the towel and dust with more flour or cornmeal. I used flour for this step (this surface will be the bottom of your bread).

Cover with another cotton towel (not terry cloth) and let rise for about 2 hours. You can see by my favorite set of towels that I’m already thinking about what to drink with this bread later on. Always planning ahead….

When ready, the dough will be more than double in size and will not readily spring back when poked with a finger. It probably won’t squirm and giggle, either. This isn’t Pillsbury dough.

At least 30 minutes before the dough is ready, place the Dutch oven (or other heavy covered pot) on a middle rack in the oven and preheat to 450 degrees F.
For a wider, flatter loaf of bread, I use a 7-quart Dutch oven; for a rounder, taller loaf I use my smaller 3½ quart Dutch oven. (Tip: wrap the handle of the lid in foil to protect it against high oven temps. I read this tip somewhere and while I’m not sure it’s necessary, or even if it works, it can’t hurt.)
When the dough is ready, carefully (use oven mitts!) remove the very hot pot from the oven. Slide your hand under the towel to pick up the dough and gently shake off all excess corn meal and flour — I do this over the sink.

Now flip the dough over into the pot, so the seam side (on the bottom of the towel) faces up.

Carefully peel off the towel, keeping the dough from sticking as best you can. It may look like a mess, but that’s okay. And if it doesn’t, that’s okay too. It’s all good.
Jiggle the pot once or twice (again, don’t forget those oven mitts) if the dough is really unevenly distributed, but it doesn’t need to be perfect: it will straighten itself out as it bakes.
Cover with lid and bake 30 minutes, then remove lid. It will be mostly done at this point, and your kitchen will be filled with the mouthwatering aromas of an authentic bakery.
Bake another 10 to 30 minutes (check every 10 minutes or so), until loaf is beautifully browned.
 Remove the bread from the pot and place it on a rack to cool room temperature, about 2 hours. This is the hardest part: waiting for it to completely cool before slicing it open. But it’s very important to let it cool first, so be patient.
Once cooled, slice it with a quality bread knife (or other serrated knife). Enjoy!

Looks like my favorite ciabatta from a beloved bakery which, unfortunately, I don’t live near any longer. Looks like the perfect recipe for me to make out here in the back woods. Thanks, Diane!
LikeLike
I LOVE no-knead bread. I make a slightly more elaborate version with a sourdough starter twice a week. For more flavor without a starter, try using beer in place of water, adding herbs, or adding more salt later on in the process (salt inhibits gluten development, which is why Lahey has you add so little).
LikeLike
Looks a little like “Artisan Bread In 5 Minutes A Day”.
LikeLike
You’re right – the recipes and techniques are very similar. I actually bought that book, solely based on my success with this recipe.
LikeLike